If I could tell my 16 year old self some things that I know now, this would be one of those things.....
Please take a few moments and watch............... And share this video!!
A high school friend and I were chatting the other day and got on the subject of laying out...
Remember the baby oil trick?? Or laying out on the roof?? Or those clear air mattressess with the silver bottoms?
What were we thinking??
Hugs ~~ Suz

Friday, May 27, 2011
Tuesday, May 24, 2011
I CAN Paint!!
I ran across more pictures of past projects. Here are some rusty tin ornaments I painted in 2007. I love how they turned out!!
(5/27/11 - I saw that Carrie at Dittle Dattle joined a linky party for projects before blogging!! Thanks, Carrie!! I'm joining too! You can join the party at Sugar & Spice, too!!)


(5/27/11 - I saw that Carrie at Dittle Dattle joined a linky party for projects before blogging!! Thanks, Carrie!! I'm joining too! You can join the party at Sugar & Spice, too!!)
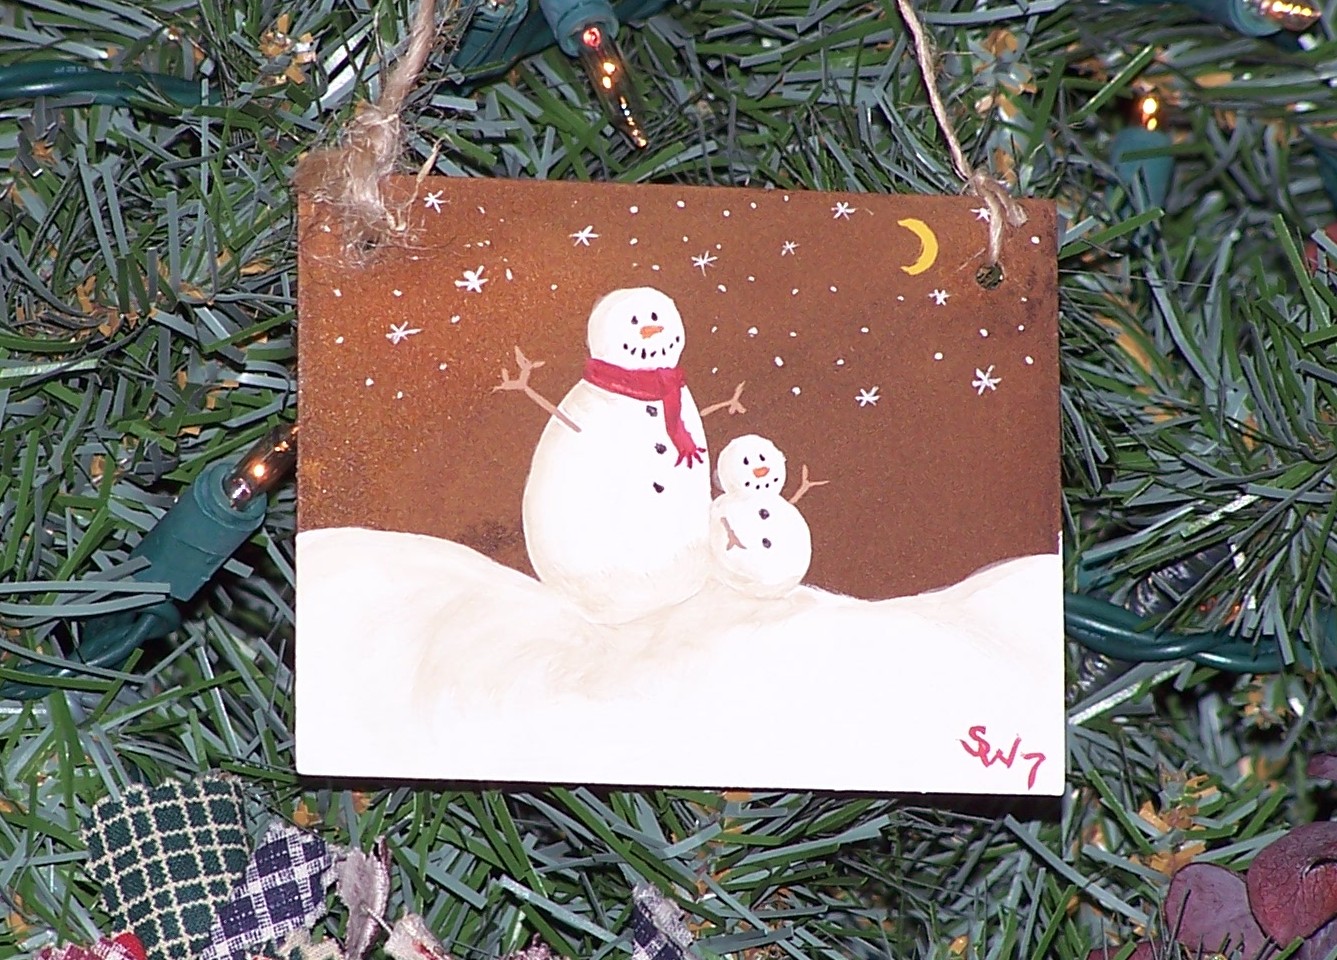


I just used acrylic craft paint. When they were dry, I put a piece of twine through them and called them 'done'! My SIL couldn't believe that I painted them.... sillee girl!!!
I just wanted to post these so you all know that I CAN sort of paint!! It's not too evident on my glass mugs!!
Have a great week!!
Hugs ~~ Suz
I'm Linking Here:
Sunday, May 22, 2011
I Didn't Wait Til The LAST MINUTE!!
My middle child turns 21 in 15 days......... That's just plain crazy, cuz I only turned 21 a couple of years ago! HA!!
I worked on a project for him today. I think it turned out ok - it's cute, but I definitely STILL need practice with these thick enamel paints and using them on glass.
Since he likes to hunt, I thought I'd incorporate some camo into the design. I cut out "21" from some vinyl. I weeded out the actual numbers and kept the 'negative'. I placed it on my glass. I also taped off a couple of strips around the top and bottom.
Starting with the green paint, I just painted globs of color inside the 21 and the bands.


After you get your design how you want it, you simply put your glass in the oven, turn it on to 350 and let it bake for a half hour.


I worked on a project for him today. I think it turned out ok - it's cute, but I definitely STILL need practice with these thick enamel paints and using them on glass.
Since he likes to hunt, I thought I'd incorporate some camo into the design. I cut out "21" from some vinyl. I weeded out the actual numbers and kept the 'negative'. I placed it on my glass. I also taped off a couple of strips around the top and bottom.
Starting with the green paint, I just painted globs of color inside the 21 and the bands.


I did the same thing with my brown paint, and then followed it up with black paint.

(I think it must have been at this point that my daughter came home from work... so I'm missing some pictures - - Sorry!!)
When the paint was sort of 'set' I pulled the vinyl off. I had to be careful that I didn't pull the paint off, too. I had my exacto knife handy and used it to score the paint to keep it from pulling off.
I used orange paint and outlined the '21'. I outlined the bands with black paint. In orange, I wrote Happy Birthday. I used the green paint for the date.


These are the paints I used. Like I said above, they're thick. And it's taking me some time to get used to that. They just don't work the same way that acrylic craft paint does.

After you get your design how you want it, you simply put your glass in the oven, turn it on to 350 and let it bake for a half hour.

Just be VERY CAREFUL when you remove it from the oven. It's flippin HOT!!!
Side note: The birthday boy thought I was nuts when he turned 16 on June 6, 2006 (6/6/6) and I wouldn't let him get his drivers license........... Sometimes you just gotta be careful - - right???
Have a super week!!
Hugs ~~ Suz
I'm linking to:
Saturday, May 21, 2011
Poor Baby Lucy!!
Before the ice storm, when Lucy was an outside girl, we didn't think about getting her spayed. We kind of played with the idea of her having a litter of pups, but the idea didn't go much further than that.
{Ice Storm, 2011} {Lucy's Pen -> AFTER the branch fell.... and smashed her pen}


After the ice storm, Miss Lucy became an inside girl. And she LOVES it!! And then last week, she started acting 'goofy', not listening and just being, well..... goofy. That's the way she acts before she goes into heat. And now she's an inside girl............. And THAT wasn't going to happen IN my house. No. Yuck!!
So Lucy got spayed Monday. Our friend, Eric, has a daughter, Terri, that volunteered to take her to the veterinary clinic she works at, about 30 miles away. So, we said ok.
Monday morning, Terri picked her up at 6:15. And brought her home around 6:30 that evening.
Poor baby.............. We talked to Terri at lunch time to see how Lucy was doing. She was just waking up, and sent us a picture on our phone............


She's just laying around........... (which is a good thing). She's got such a pitiful, sad little face.........
And Miss Terri is bringing antibiodics tomorrow, when she's done working at the emergency animal clinic.
And because of how great Terri has been this week, helping and driving her down there and all, I made her this..........

 And I added a gift card......... because we REALLY appreciate her!!
 And Lucy told me what to write on the outside..... She's very creative that way!!
I also made one of these cups for my daughter because, well, because I just love her!!


I got the cups at Kohl's before Christmas. They were half price. I used vinyl from the stash I got earlier this year from our local sign shop. I cut the vinyl with my cricut using my Sure Cuts A Lot software.
Now............ I need to find one of these cups so I can have one, too!!
May 22, 2011 - - Terri LOVED her gift from Lucy!! Yay, Lucy!!!
Have a great day!!
Hugs ~~ Suz
I'm linking up with these fabulous parties!

{Ice Storm, 2011} {Lucy's Pen -> AFTER the branch fell.... and smashed her pen}


Lucy WAS NOT hurt. A little shook up, but NOT hurt! Thank You, God!!
After the ice storm, Miss Lucy became an inside girl. And she LOVES it!! And then last week, she started acting 'goofy', not listening and just being, well..... goofy. That's the way she acts before she goes into heat. And now she's an inside girl............. And THAT wasn't going to happen IN my house. No. Yuck!!
So Lucy got spayed Monday. Our friend, Eric, has a daughter, Terri, that volunteered to take her to the veterinary clinic she works at, about 30 miles away. So, we said ok.
Monday morning, Terri picked her up at 6:15. And brought her home around 6:30 that evening.
Poor baby.............. We talked to Terri at lunch time to see how Lucy was doing. She was just waking up, and sent us a picture on our phone............
aawwww...... Poor Baby!!
Lucy has been doing pretty well this week.................. until yesterday............. I guess that between the shaved belly hair growing back, and the stitches healing and itching, she started licking.......... and tugging on her stitches............. and this morning......... it wasn't pretty. One of the stitches was bleeding and now she's swollen....... So we called Terri. She came right over and made arrangements to get a CONE for Lucy........
Now poor Lucy is so ashamed................. she's so sad.......

Lucy does not like the cone of shame.
She's just laying around........... (which is a good thing). She's got such a pitiful, sad little face.........
And Miss Terri is bringing antibiodics tomorrow, when she's done working at the emergency animal clinic.
And because of how great Terri has been this week, helping and driving her down there and all, I made her this..........


I also made one of these cups for my daughter because, well, because I just love her!!


I got the cups at Kohl's before Christmas. They were half price. I used vinyl from the stash I got earlier this year from our local sign shop. I cut the vinyl with my cricut using my Sure Cuts A Lot software.
Now............ I need to find one of these cups so I can have one, too!!
May 22, 2011 - - Terri LOVED her gift from Lucy!! Yay, Lucy!!!
Have a great day!!
Hugs ~~ Suz
I'm linking up with these fabulous parties!
Wednesday, May 18, 2011
Who Knew??
The other night, when I got home from work, these greeted me in my kitchen.
They look rather sad and pitiful because they know that no one in the house is particularly crazy about bananas when they look like this. "I only like GREEN bananas!!" UGH............... Then why did you not eat them when they WERE green??
I was weighing my options at this point. Banana Bread? hhmmm?? No. Banana Cake or Cupcakes? hhmmm?? Sounds tempting, but..... No. I really was in the mood for Banana Pudding.............. And I usually just line a dish with vanilla wafers, cut up the bananas, cover with vanilla pudding and whipped cream and - - Done!!
But dang it............ No boxes of vanilla pudding were in my cabinet...... And I just DID NOT want to go to the store just for a couple of boxes of pudding...... Well.... Now what?? I've never made pudding from scratch. I don't even have a recipe for home made pudding. So I sat down at the computer and did a little search-a-roo...... (I know - - shocking, right??) I found this recipe on foodnetwork.com and I think it's a keeper!! (It was submitted by Marcia Suber (gotta give credit where credit's due, right?? - - THANK YOU, Marcia!!)
Grandmother's Banana Pudding
1/2 cup sugar
3 eggs, separated (keep the egg whites if you want to top it with meringue)
2 tablespoons flour (or cornstarch)
Dash salt
2 cups milk
1 teaspoon vanilla
1 box vanilla wafers
4 bananas
Prepare a double boiler. In your top saucepan, mix together sugar, egg yolks, flour (or cornstarch) and salt.

Add milk and mix again (I used my wire whisk for the mixing).

Stir this pretty often as it's sitting on the double boiler with the water in the bottom saucepan at a rolling boil. When the pudding starts staying up on the sides as you're stirring, its done. Add the vanilla after the mixture has thickened. It takes about 20 minutes to get to the pudding consistency.
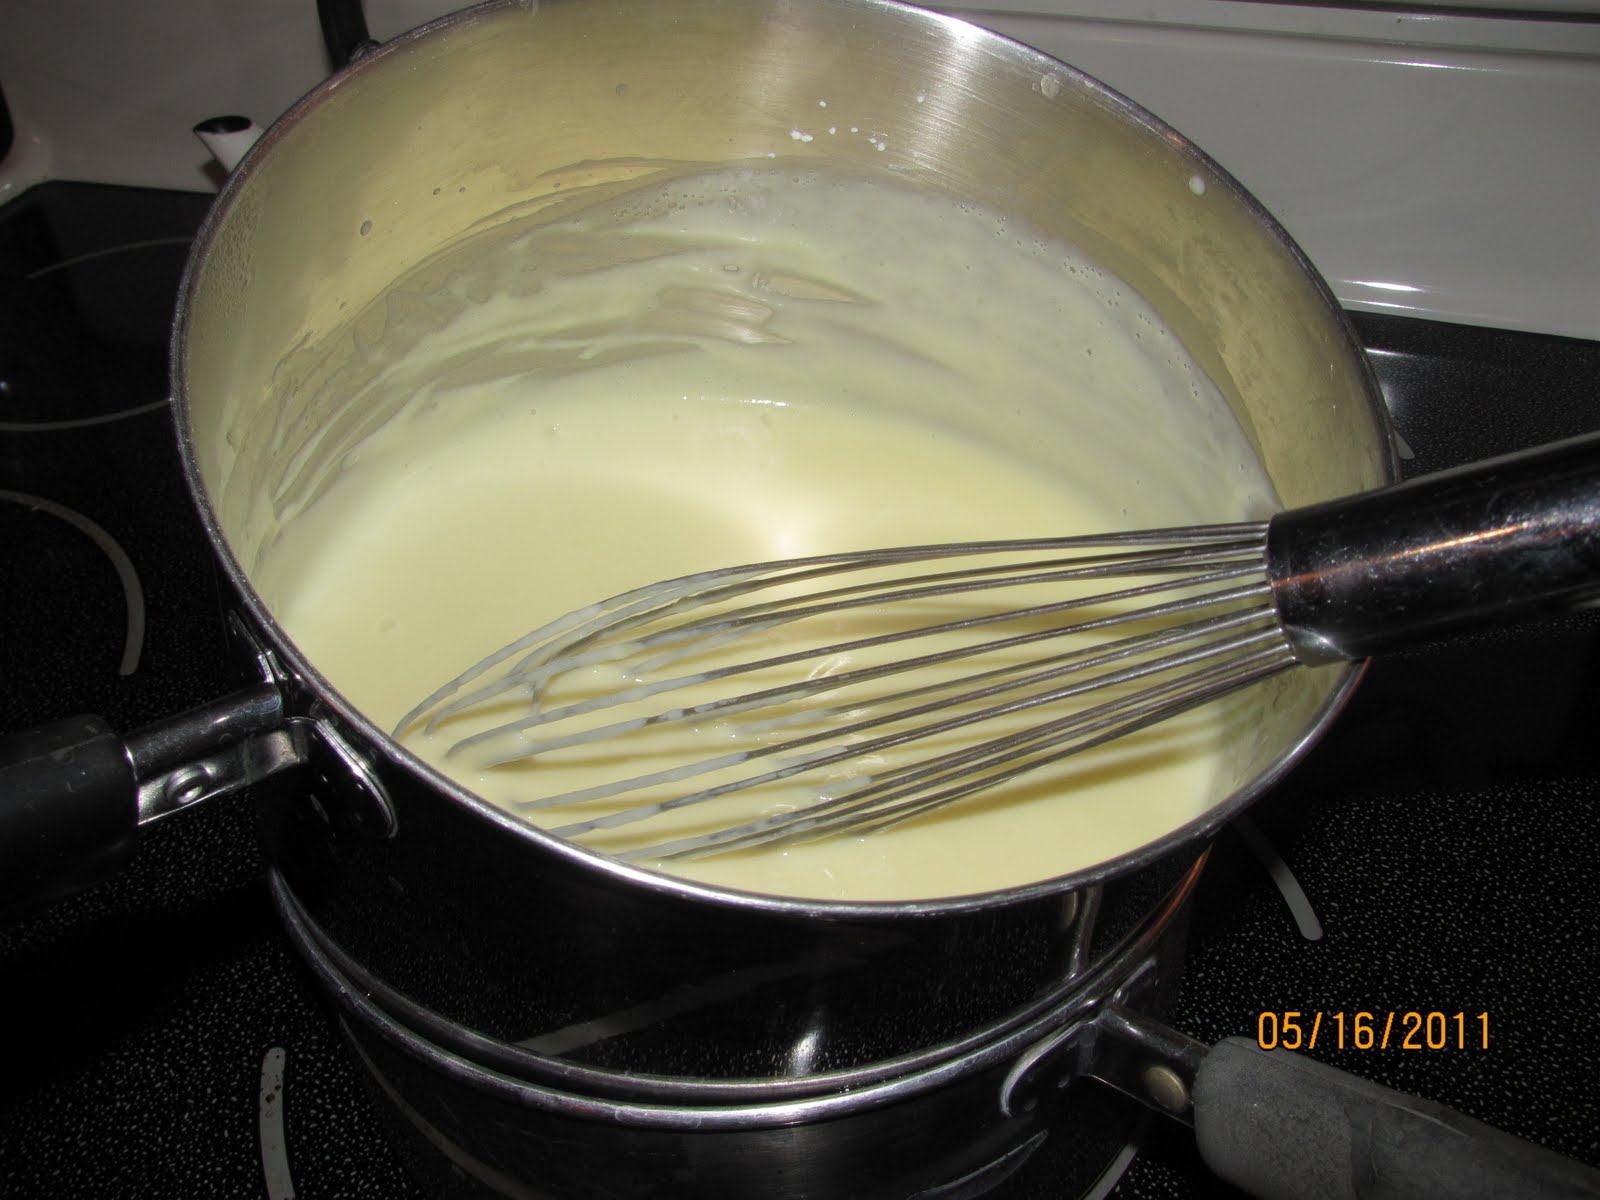
(See how it's starting to stay up on the sides??)
Remove from heat and let cool. (I put mine in a mixing bowl and popped it in the freezer for about 10 minutes or so........ I was too excited to let it cool on it's own!!)
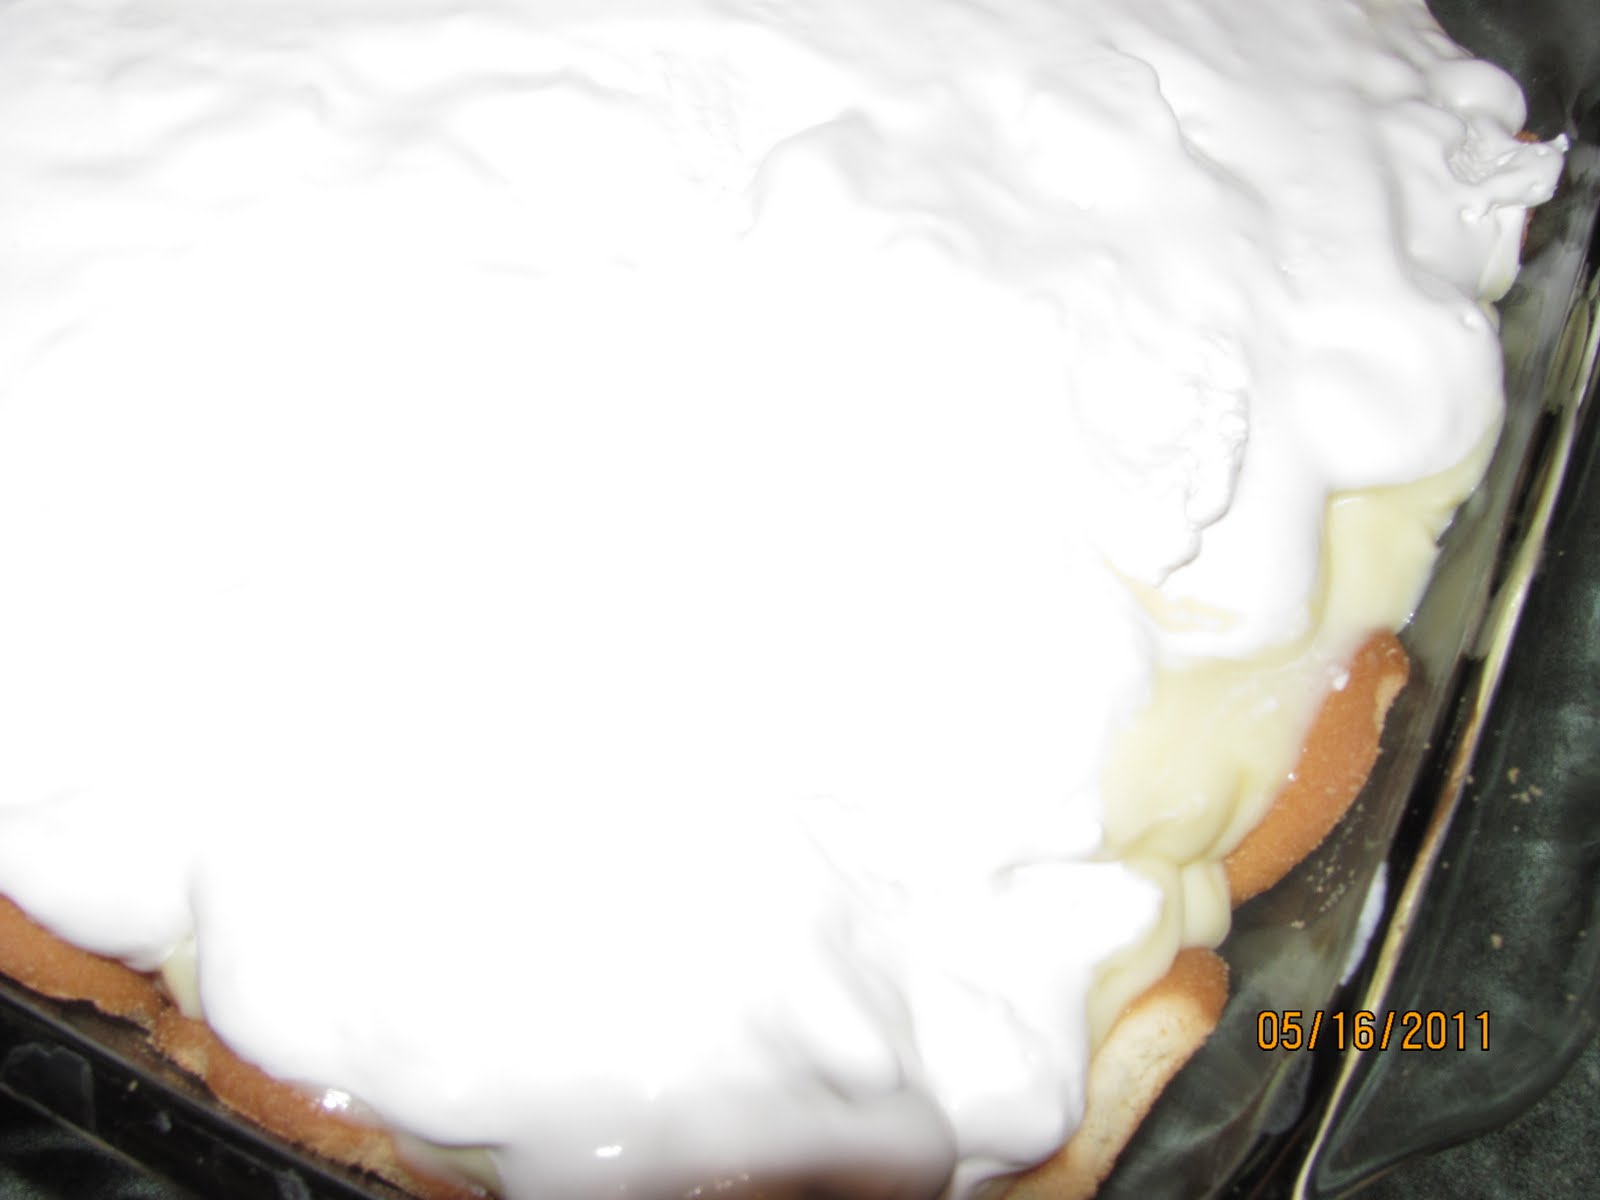
To assemble: In a 9 x 13 glass dish, put a couple of spoonfuls of pudding in the bottom and spread it around. (That's what the recipe says to do so I did; I guess it's to help keep the wafers in place....) Line the bottom of the dish with a layer of vanilla wafers. Cut up 2 of your bananas and put those on top of the wafers. Add half of the pudding. Repeat.
Now, this is where I REALLY didn't follow the recipe.............. I put the whole batch of pudding in one layer, and had to make another batch of pudding. Seriously, I like pudding, and I like my Banana Pudding to have lots of pudding..... and 'nanas...... and vanilla wafers.....


The recipe calls for topping it with meringue, which I got pretty excited about, because I've never made that, either!! But I was out-voted.......... They wanted whipped cream............... And I didn't have any........... And they were just a little too eager to go to the store to get some............ So.... no meringue.......................
I topped it with the whipped cream.......... and wow...................... sooo yummy!!
As soon as I had it all put together, I had to dig in right away. I almost didn't even take a picture of it all together!!
It was still a little warm........... mmmmmm. Mr. Inspiring had 2 helpings........ at 10:30 at night........... silly boy!! I think he liked it!! (Keep it in the fridge if you can't eat it all at once!!)
So after supper last night, I had a dish of its cold creamy banana-y-ness........ OOOOOOOOOOOHHHHHHHH....
It's amazing how all those flavors just blend together and the wafers soak it all up.......
If you want to make the meringue, here's the recipe:
1/4 cup sugar, 3 egg whites, 1/4 teaspoon cream of tarter
In a separate bowl, beat egg whites, sugar and cream of tarter until it forms stiff peaks. Spread over your banana pudding layers, and pop it in a 425 degree oven until just brown on top - - about 4 minutes.....
I don't believe I will EVER serve my family 'boxed' pudding again. The pudding from scratch is so much yummier and richer and it's soo easy!! Now, I'm hunting for a decadent chocolate pudding recipe.
Got one to share???
And I sooo want to make a key lime pie from scratch. Like the pies they have at Shorty's in Miami..... where my grandma and grandpa used to go when they were visiting my Aunt Shirley. There's just nothing that compares to an authentic Key Lime Pie.............. Nothing!!
Hugs ~~ Suz


Saturday, May 14, 2011
Family Recipe Book
I ran across these pictures of a project I did about a year and a half ago for my ex-sil. At that time, my daughter had moved in with her and her husband and I wanted to thank her for helping out. When I was married to her brother, I had acquired a few recipes from some of their relatives. But I wasn't sure if she had ever gotten them all. So I made this recipe book for her.

I had gotten a themed pack of paper from Wal-Mart and used it for this project. At first, I wasn't too crazy about the color combo, but, given the choices our small Wal-Mart offered, this was the best one. After I finished the project, I really liked the colors and how it turned out.
I made two of these at the same time because whenever I make something for someone and I end up liking it, I have a hard time giving it. And I always think that I can make one for me, and never usually do.
The front and back covers are made out of that really heavy press-board cardboard stuff you can get at Hobby Lobby. I got it when I first got my cricut and it doesn't cut at all in it. It does work well in my papercutter, so I use it for straight-edged projects.

I glued the paper to each side of the covers. Decorated the front cover and distressed the edges. I used manilla folders as my 'card stock' for the dividers. Using my cricut and design studio, I made the dividing pages, decorated and distressed them, too. I used the cartridge "From My Kitchen" for the labels.


For the pages for the recipes, I just used my paper cutter on the manilla folders, and cut them to the same size. I decorated them up, printed the recipes out from my computer, and glued them on. And Distressed all the edges...... Mr. Inspiring thought I was crazy when I was doing it, but really liked it when I was finished!!!
I punched holes on the side of each page and slipped a couple of binder rings through. I tied a bit of ribbon onto the rings.
And WAA LAAAA - called it done!!


I had gotten a themed pack of paper from Wal-Mart and used it for this project. At first, I wasn't too crazy about the color combo, but, given the choices our small Wal-Mart offered, this was the best one. After I finished the project, I really liked the colors and how it turned out.
I made two of these at the same time because whenever I make something for someone and I end up liking it, I have a hard time giving it. And I always think that I can make one for me, and never usually do.
The front and back covers are made out of that really heavy press-board cardboard stuff you can get at Hobby Lobby. I got it when I first got my cricut and it doesn't cut at all in it. It does work well in my papercutter, so I use it for straight-edged projects.

I glued the paper to each side of the covers. Decorated the front cover and distressed the edges. I used manilla folders as my 'card stock' for the dividers. Using my cricut and design studio, I made the dividing pages, decorated and distressed them, too. I used the cartridge "From My Kitchen" for the labels.


I punched holes on the side of each page and slipped a couple of binder rings through. I tied a bit of ribbon onto the rings.
And WAA LAAAA - called it done!!
Now, I need to collect recipes from Mr. Inspiring's family and make a few of them, too!!
Thanks for looking!! Hope you enjoyed my trip down memory lane!! ha!
Hugs ~~ Suz
I'm linking to these parties!!
Subscribe to:
Posts (Atom)